Creating and Connect to an EC2 Instance
Create a Windows EC2 Instance
Navigate to the EC2 service.

Select Launch instance to create a new EC2 instance.
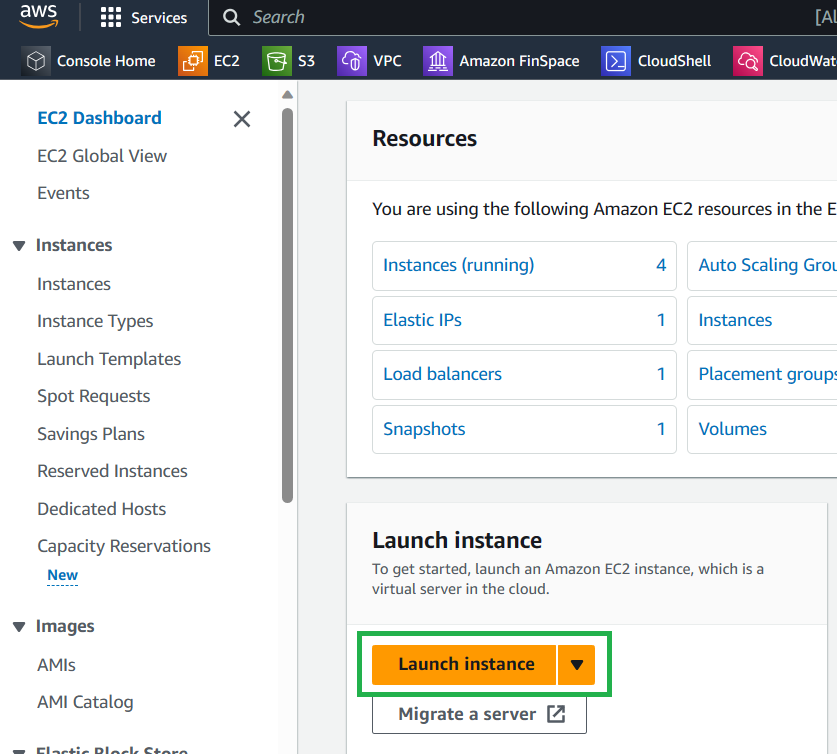
Most options here can be left as their defaults. Here are the ones that need selected/changing:
-
Select "Windows" from the
Quick Startoptions.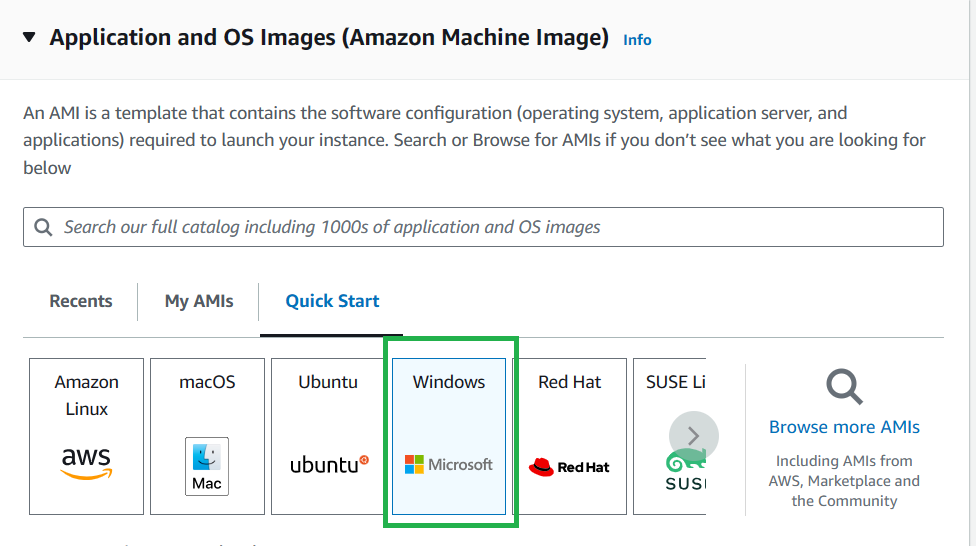
-
We need to create a new key pair: Select
Create new key pair.
-
Enter a name for your key pair, leave the key pair type as
RSAand the file format as.pem. This will download a key file to you PC which you will use to connect to the instance.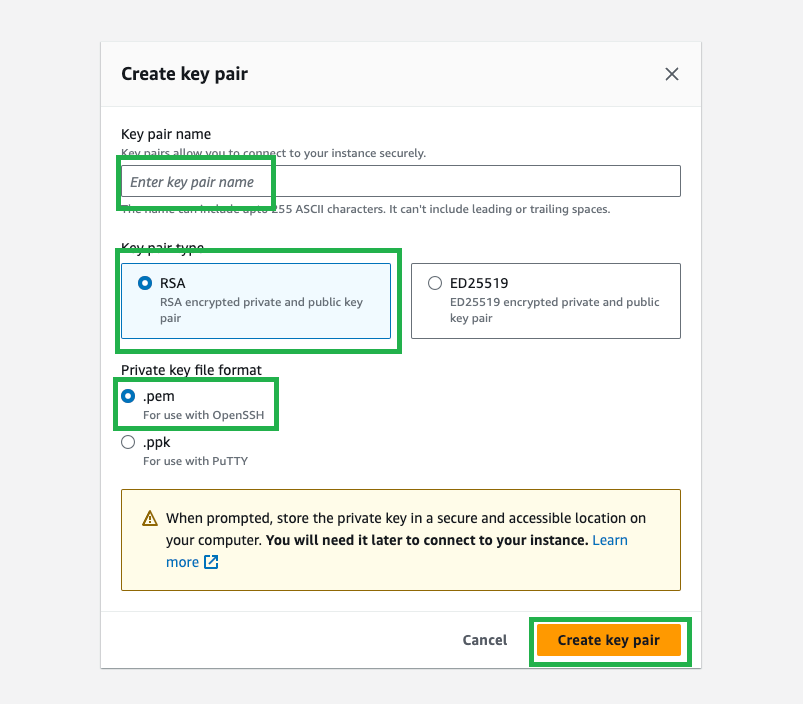
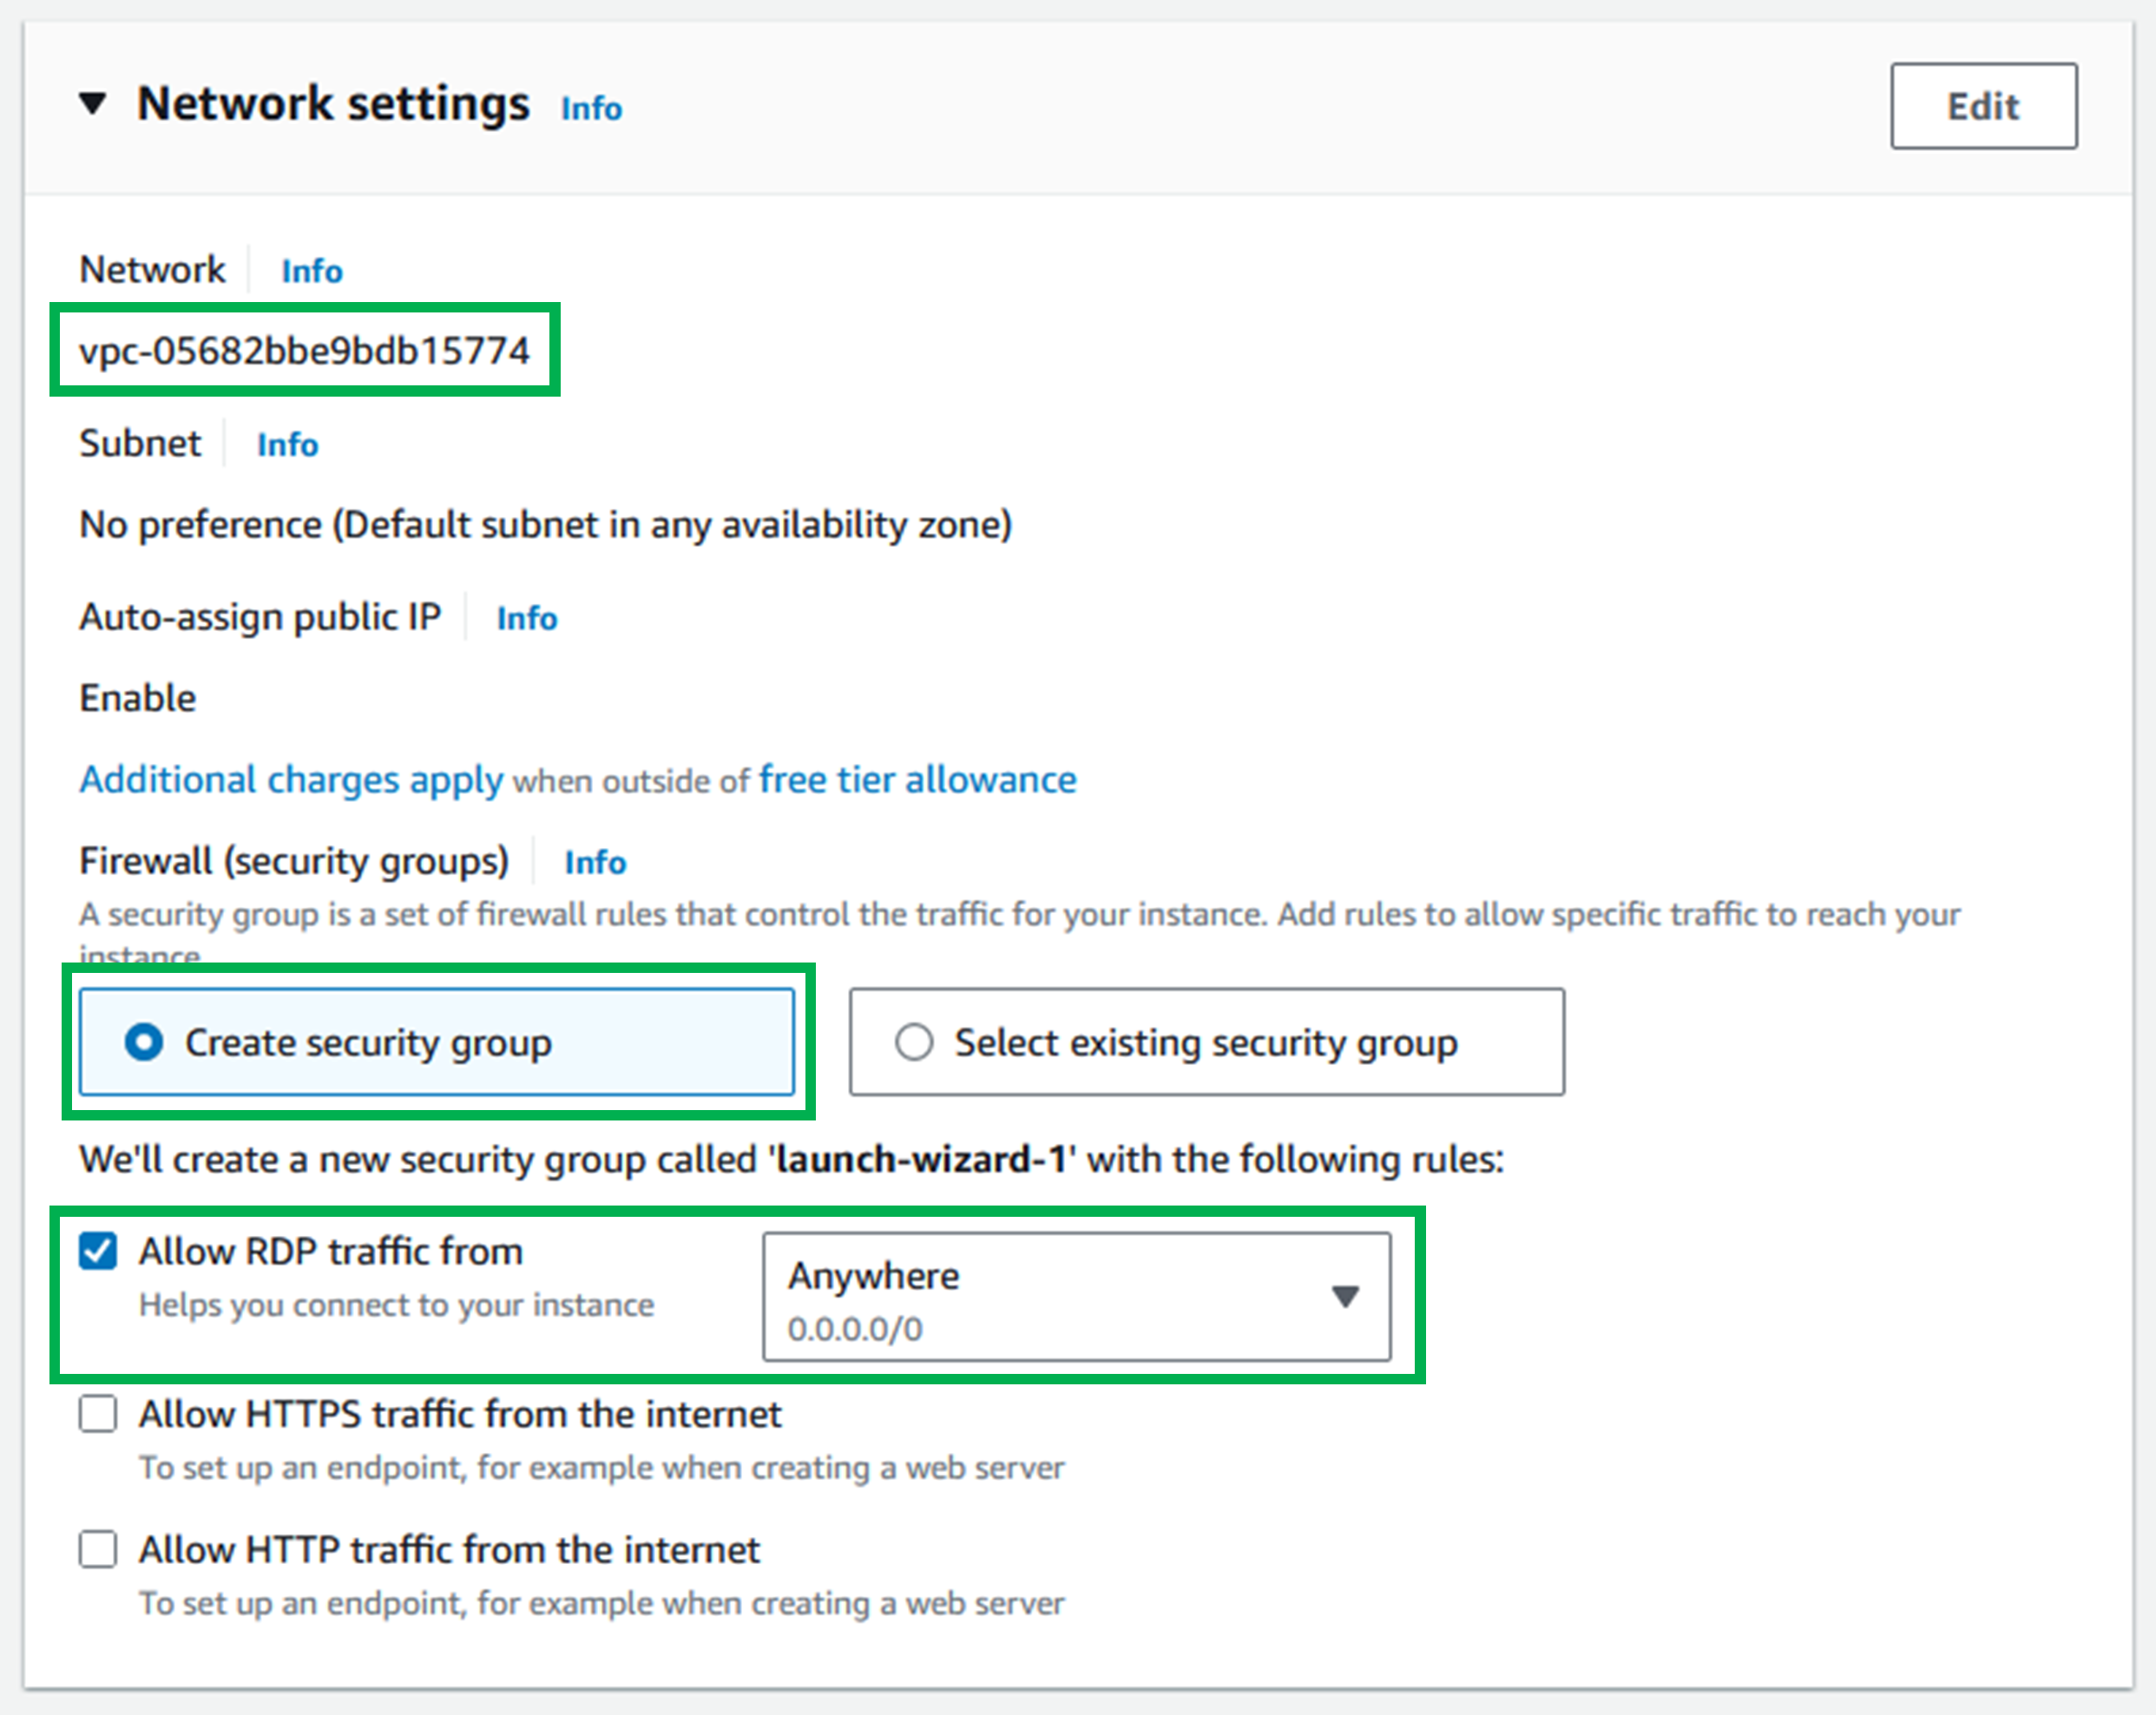
The network should be in the same VPC as your cluster. Select Create security group that allows Remote Desktop Protocol (RDP) connections from anywhere.
- This is only for the purposes of the MVP. For customising see this page on security groups.
Adding your new security group to you EC2
Now we need to add the security group of your cluster to your EC2.
Navigate to EC2 service.

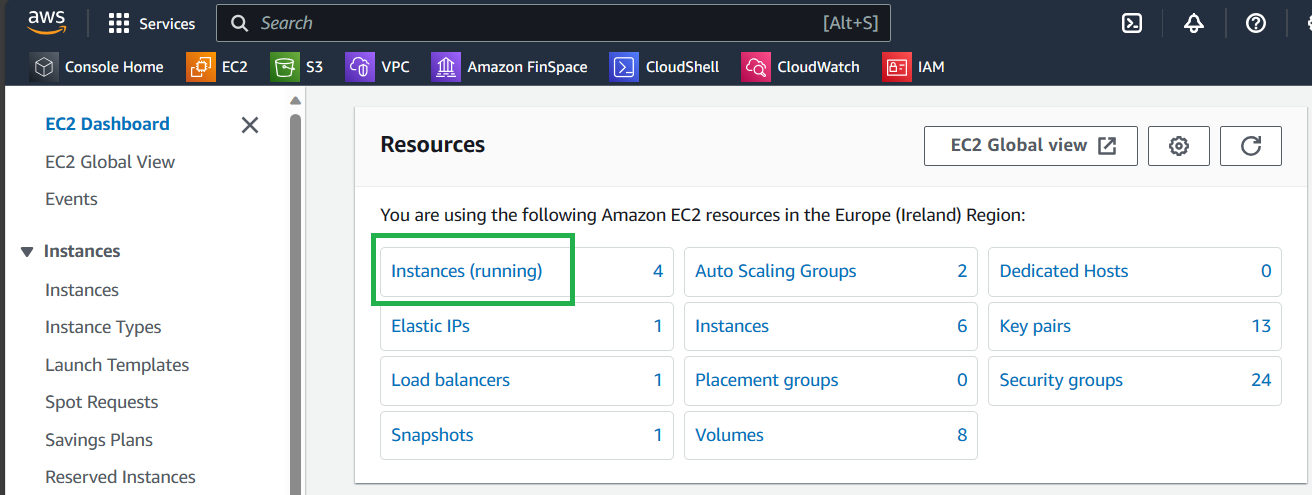
Select Instances (running).
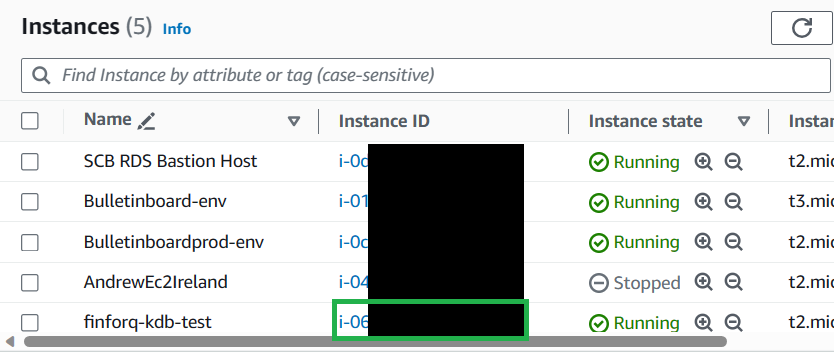
Open your EC2 Instance.
Select Actions -> Security -> Change security groups.

Search and select the security group that is on your clusters, select Add security group then Save.
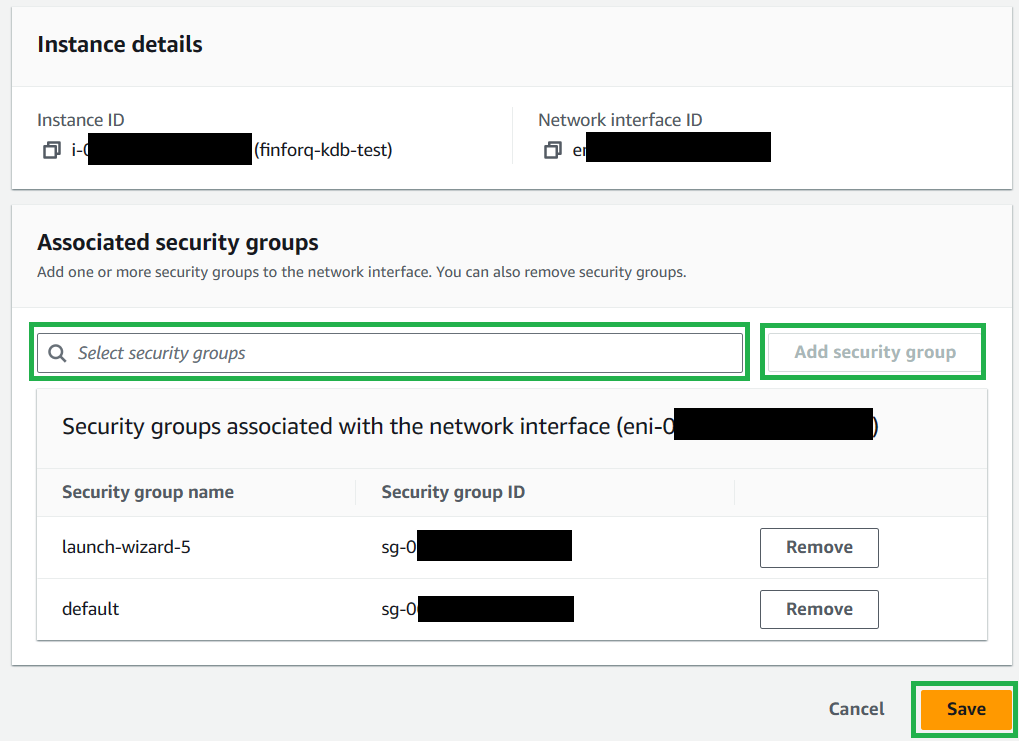
You should now have two security groups, one from the launch wizard, and the one you added manually that is also attached to your clusters.

Connecting to your EC2 Instance
Open your EC2 Instance.

Select Connect.

Get your password
This only needs to be done once. Once you have this password you can skip this step.
Select Get password.
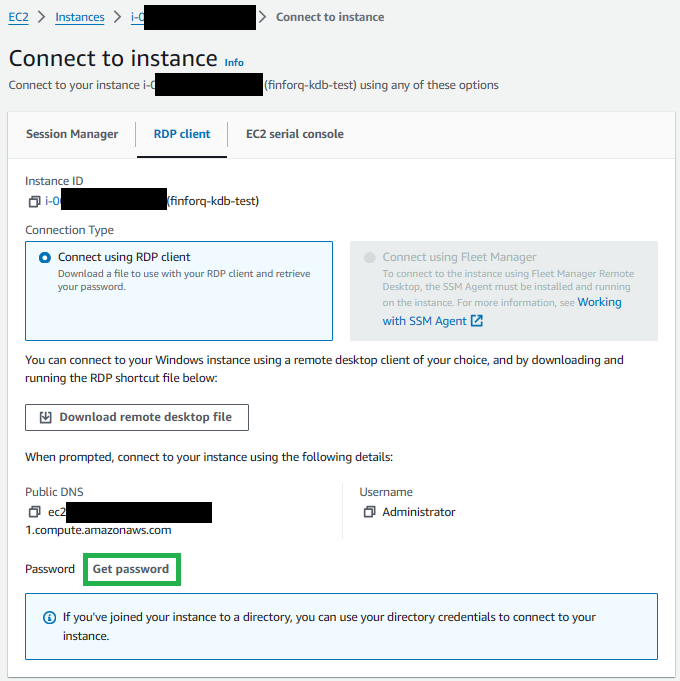
Upload the .pem that was saved to you PC earlier (alternativly you can just paste the contents of this file in the text box).
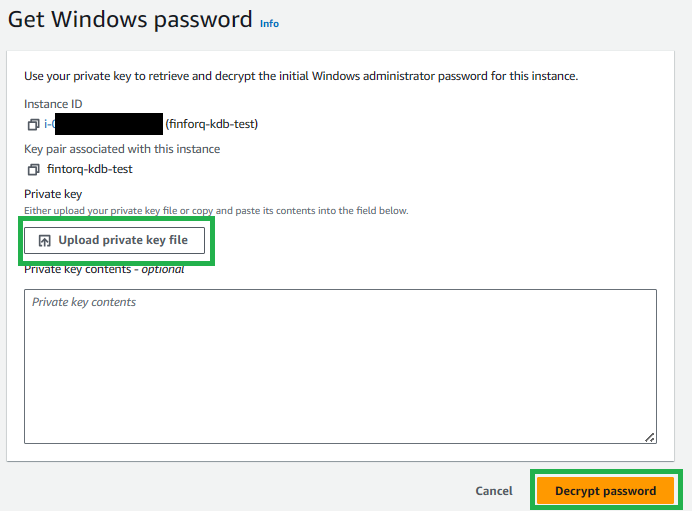
This will return the value of your password. Keep a note of this password as you will need it to connect your EC2.
Connect
Download the remote desktop file.
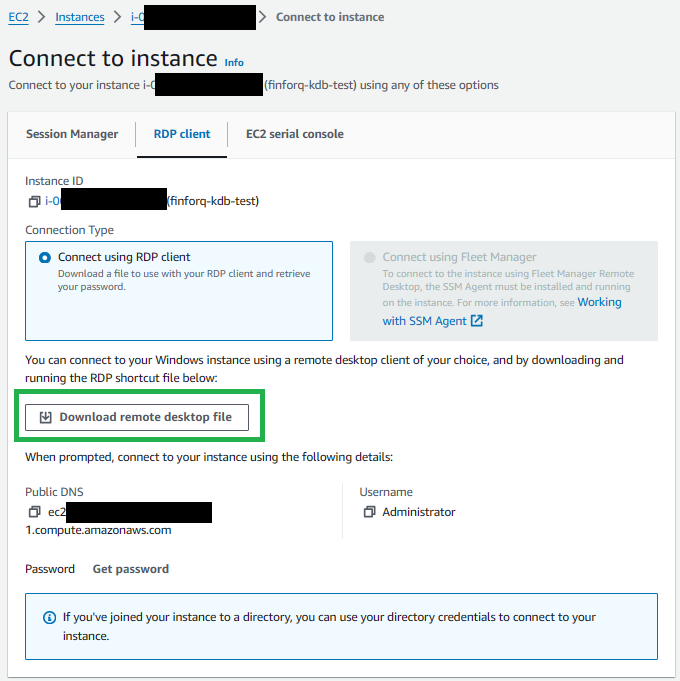
Run this file and enter the password you recieved above when promted. You should now be connected to the Windows remote desktop.