Creating TorQ Clusters
If you have set up your environment using our Terraform deployment option, this page is purely informative. Your clusters will have been created for you by Terraform.
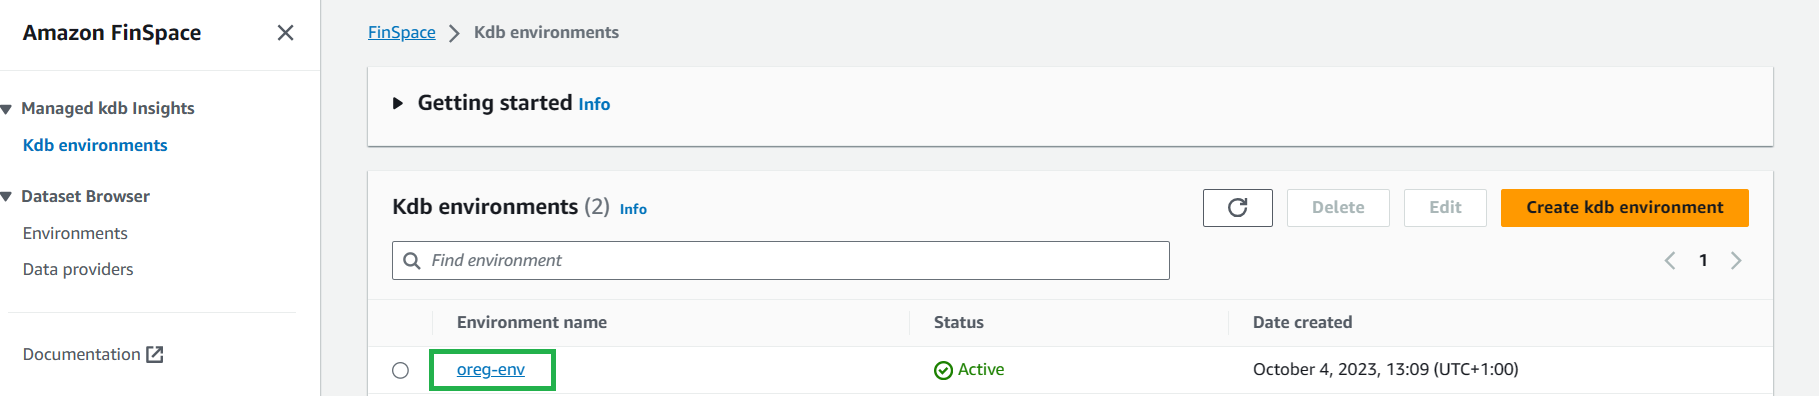
To create a cluster, first select your kdb environment:
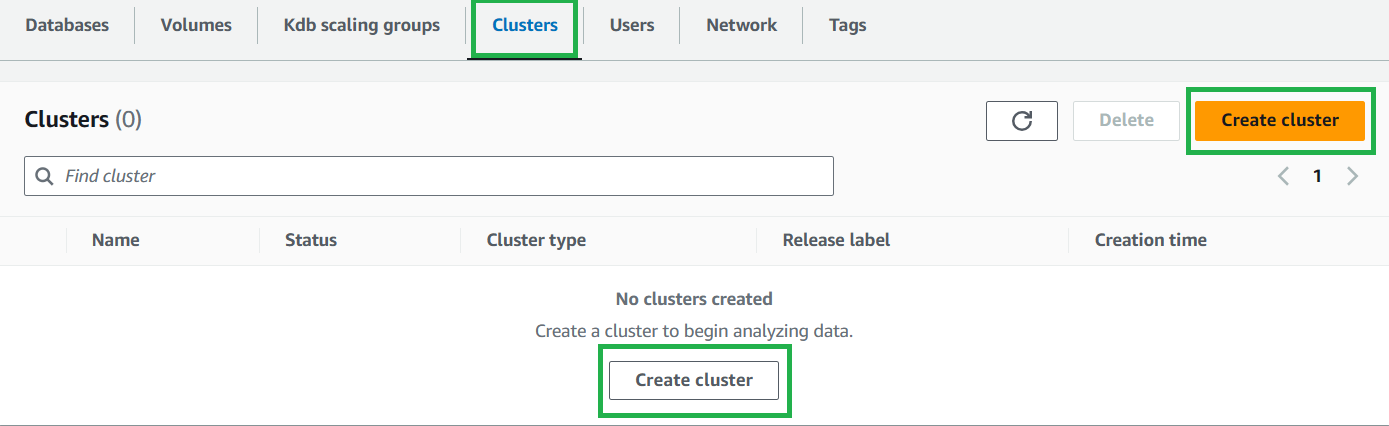
Then select the Clusters tab, then either of the Create cluster buttons:
Prerequisites
For these clusters, you will require:
- A kdb scaling group
- A database with:
- A changeset
- A dataview
- A volume
Discovery Cluster
-
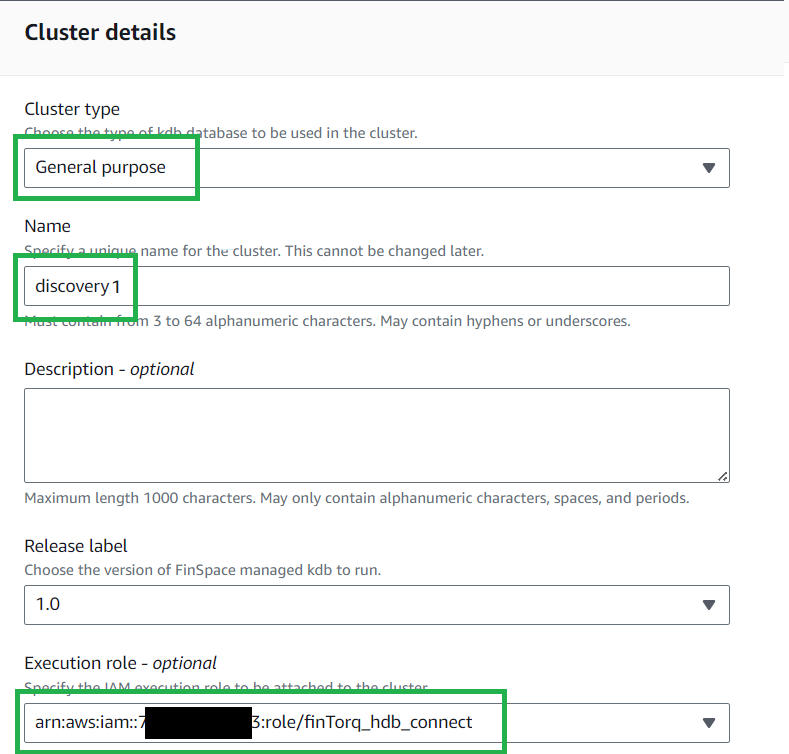
Set the
Cluster typetoGeneral purpose, also known as "GP". -
Choose a name for your cluster.
- Note: This name must match your process name (
procname) added during the next stage of cluster creation - This is due to process connections requiring the cluster name, which is not visible from within the process, butprocnameis. Our suggestion is to use the process type (proctype) with a number, e.g.discovery1.
- Note: This name must match your process name (
-
Select the execution role for the IAM user previously created. The user for all 6 clusters should be the same. This is so that each cluster has the correct permissions.
-
Select
Run on kdb scaling groupfor the Cluster running option.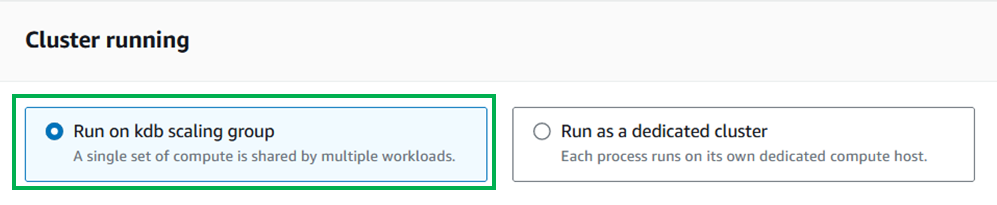
-
Choose your group in the dropdown in the
Kdb scaling group detailssection.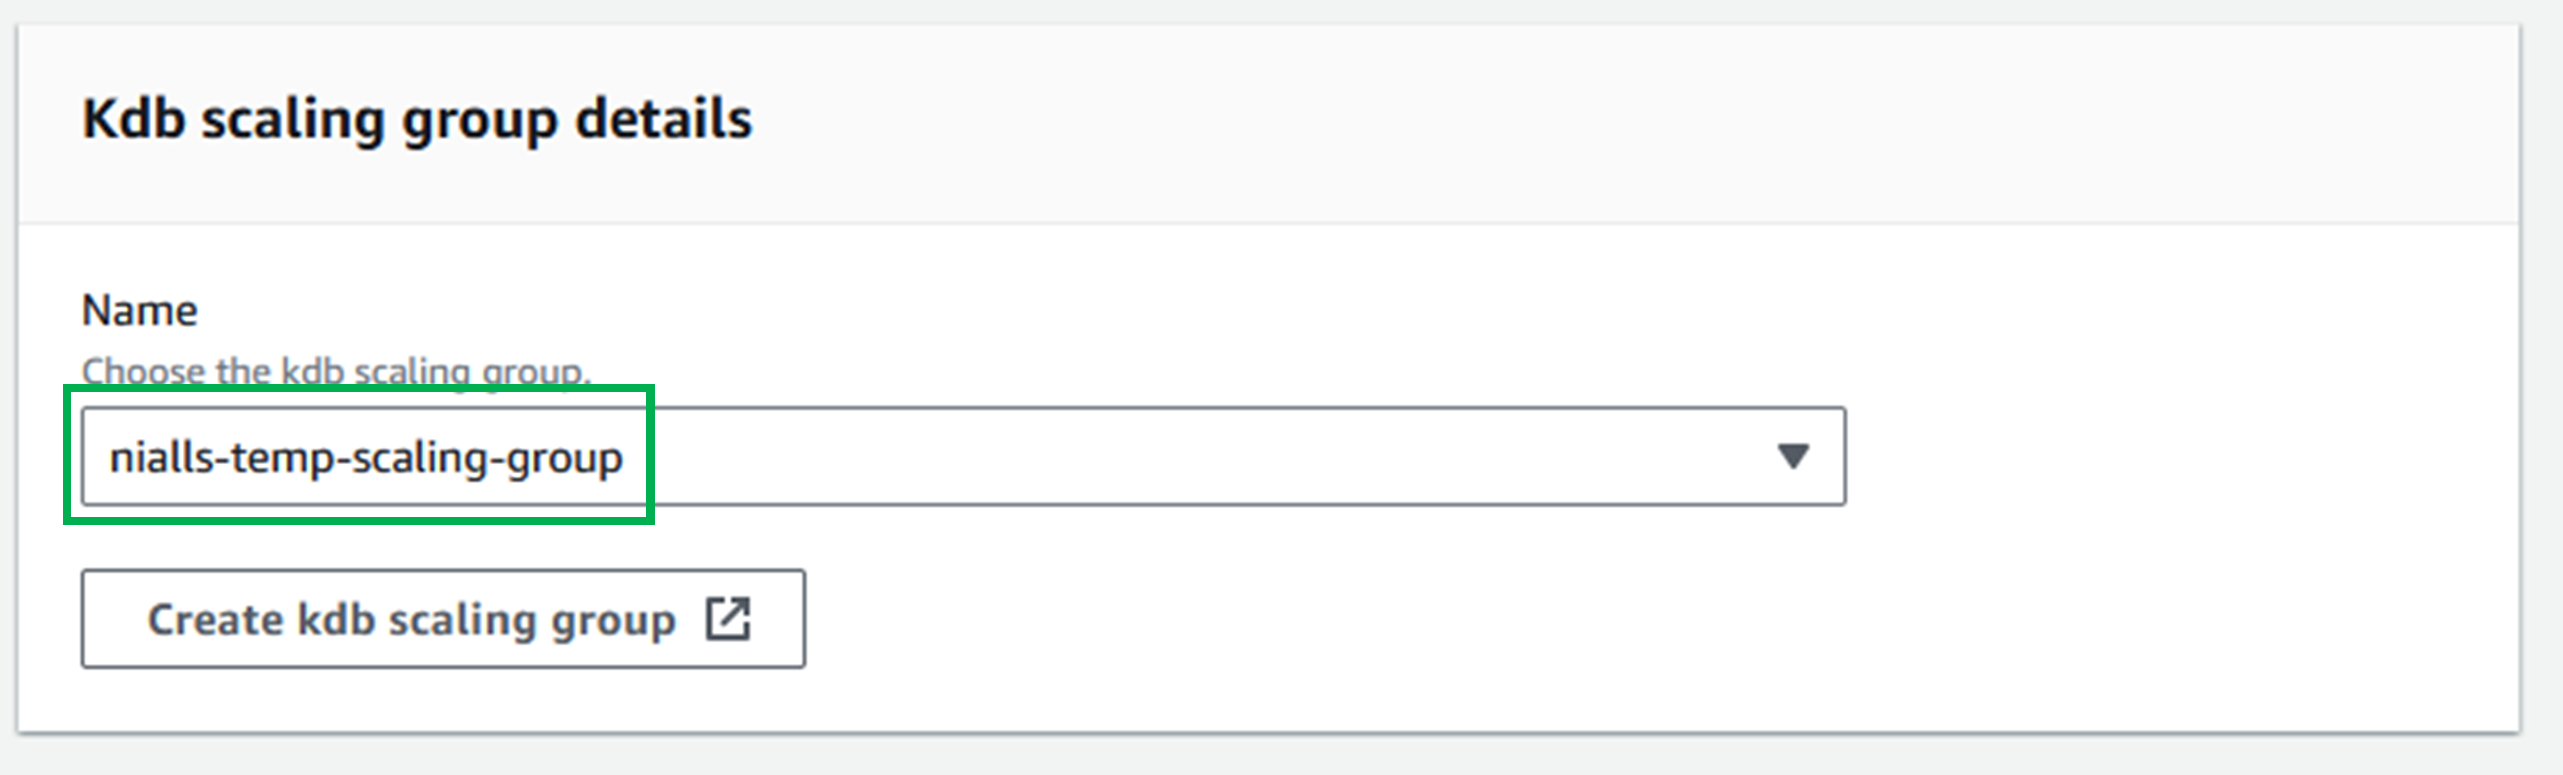
-
In the
Node detailssection, set theMemory reservation per nodeto the minimum allowed (6 MiB) and leave the rest blank.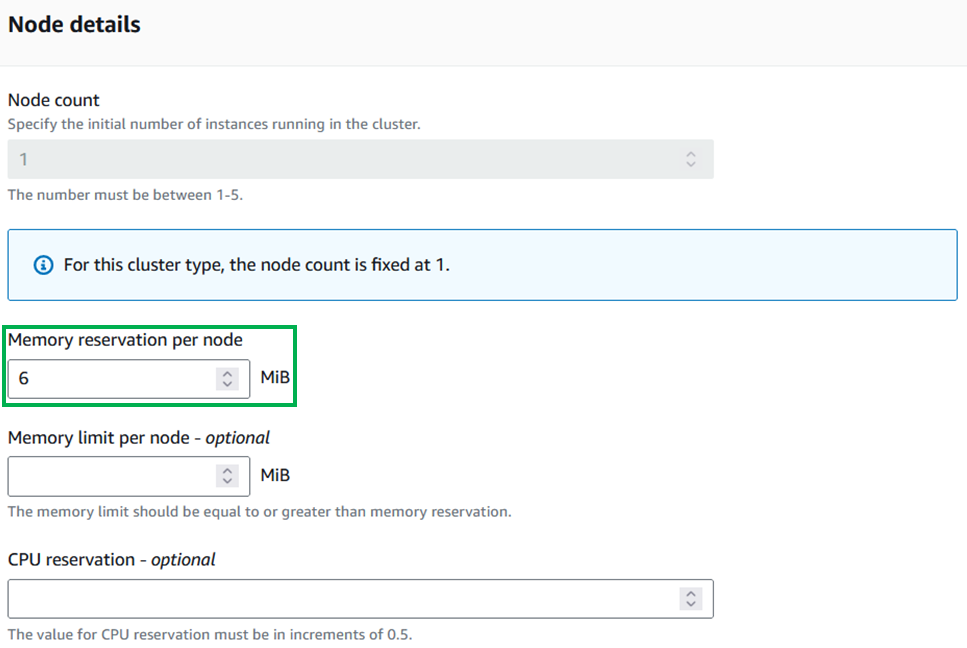
-
Leave Tags as empty and select
Nextto go to the next page. -
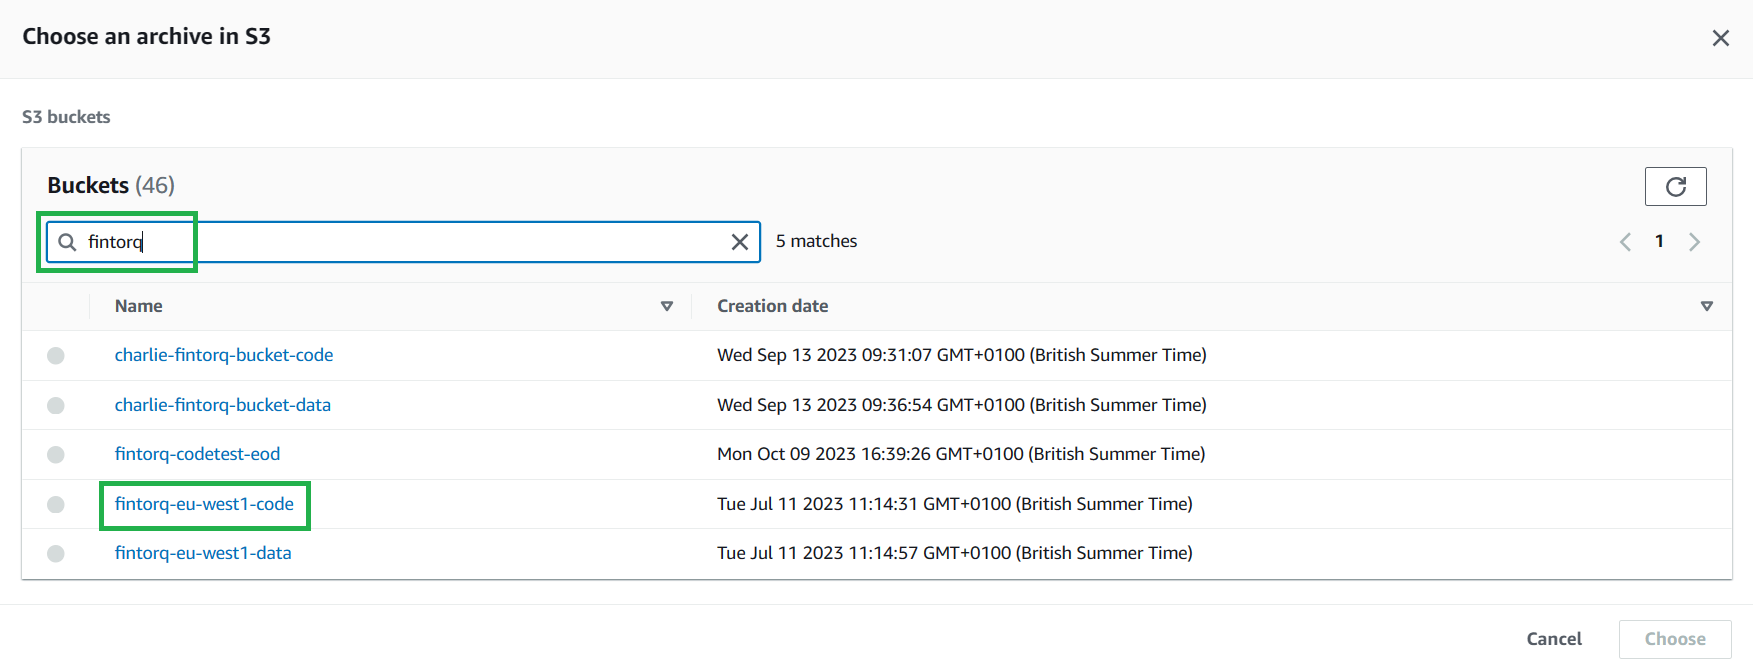
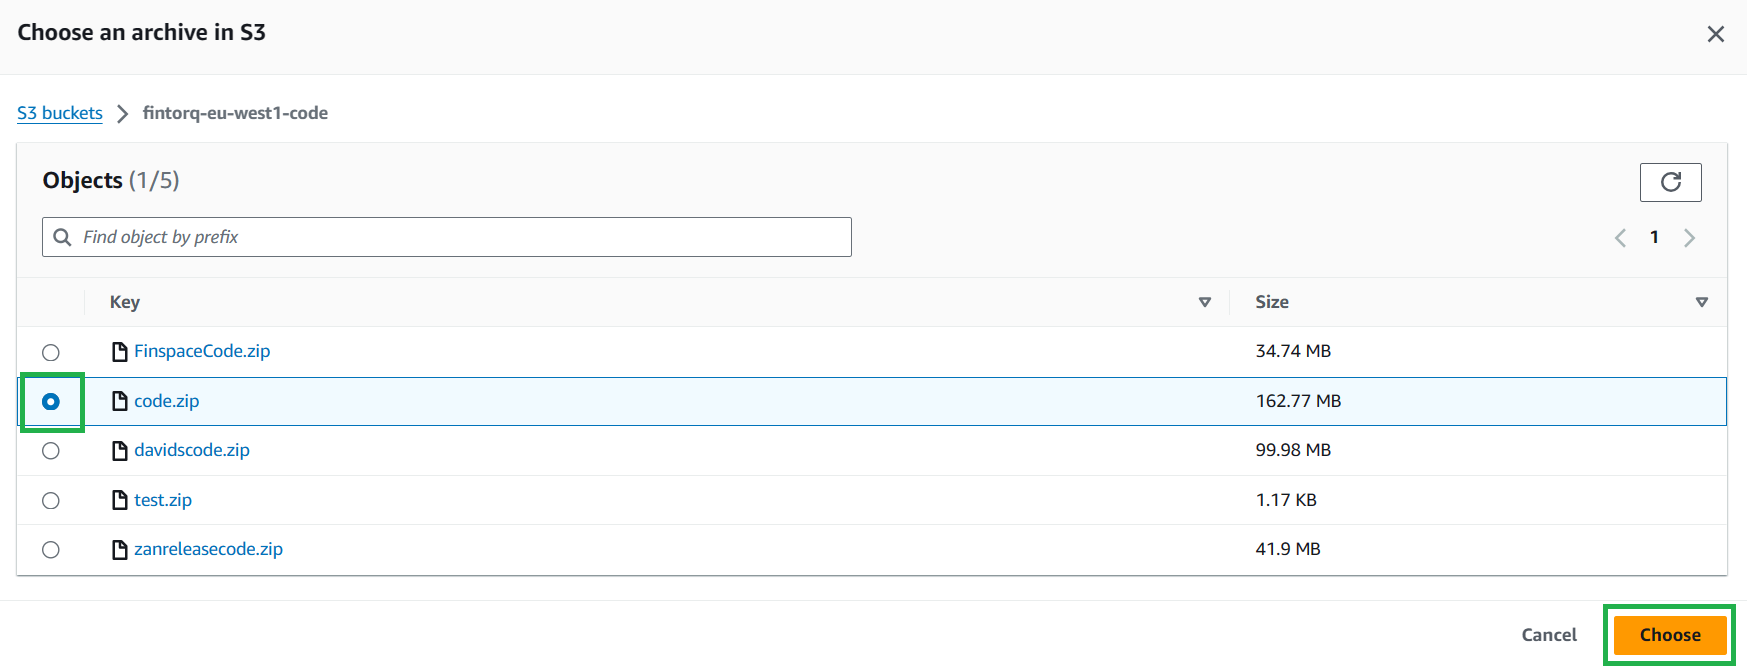
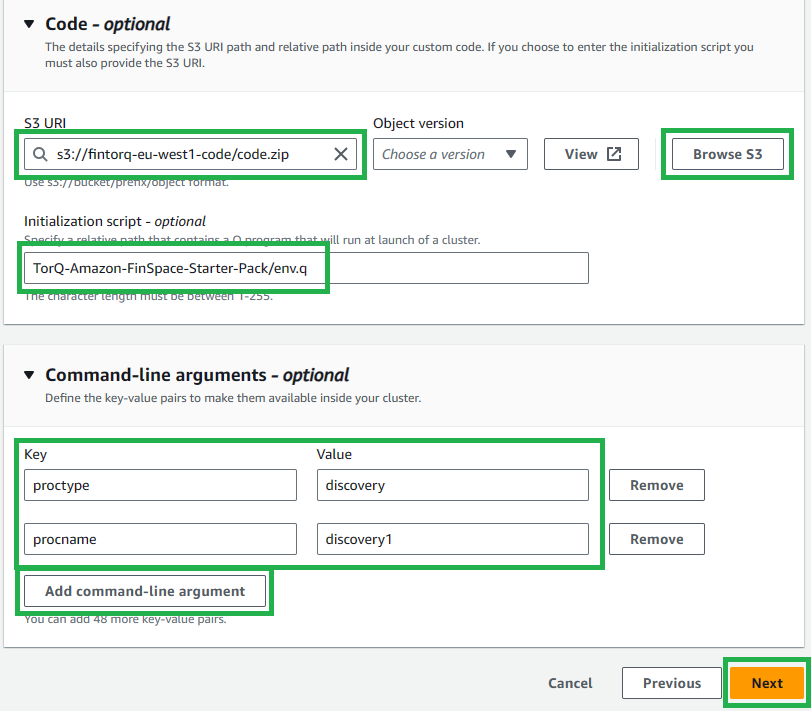
Select
Browse S3, search and select your codebucket and select your code.zip file.- Alternatively, you can copy the URL from the codebucket itself.
-
Enter
TorQ-Amazon-FinSpace-Starter-Pack/env.qas your initialization script. -
Select
Add command-line argumenttwice and enter the keys and values in the below table:Key Value proctype discovery procname discovery1 This specified initialization script and the command line arguments will set up the necessary environment for your cluster.
-
Select
Nextto go to the next page. -
Select your previously created VPC ID, Subnets, and Security Groups (we can use the readily available default), then select
Nextto go to the next page.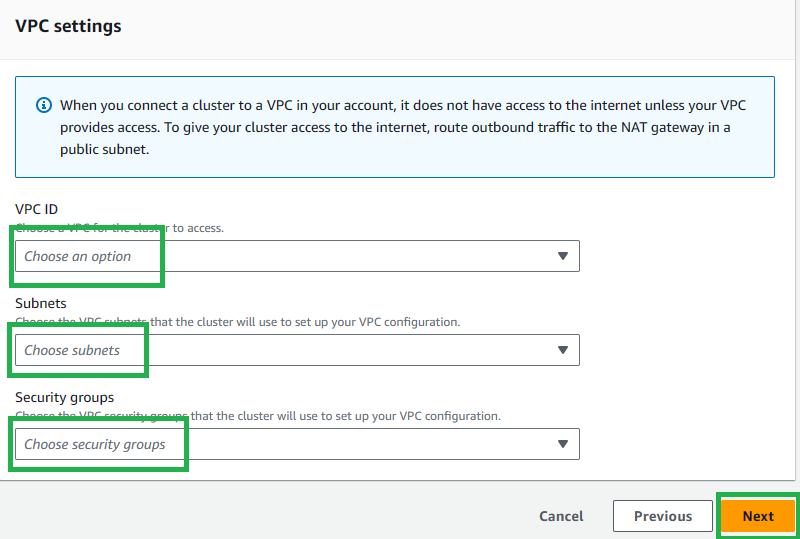
-
Leave everything as blank and click
Nextto move on to the next page.
14. Check the entered information in the review page, then select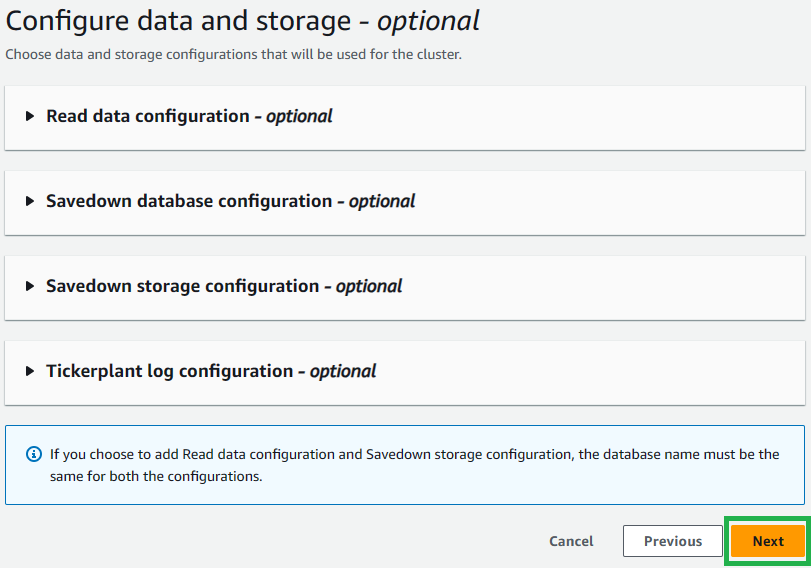
Create cluster.
Ticker Plant (TP) Cluster
-
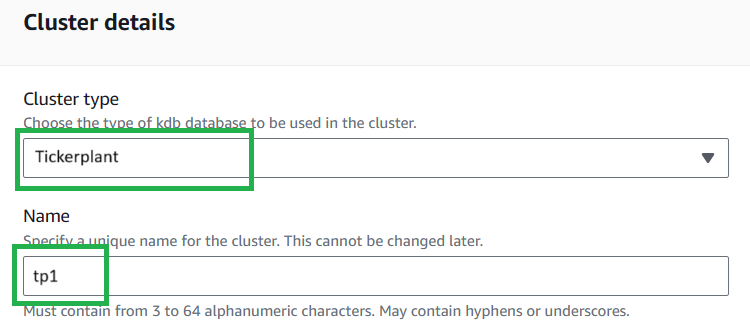
Set the cluster type to "Tickerplant".
-
Choose a name for your cluster.
- Note: This name must match your process name,
procname, added during the next stage of cluster creation - This is due to process connections requiring the cluster name, which is not visible from within the process, but procname is. Our suggestion is to use the process type (proctype) with a number e.g.tp1.
- Note: This name must match your process name,
-
Select the execution role for the IAM user previously created. The user for all 6 clusters should be the same. This is so that each cluster has the correct permissions.
-
Select
Run on kdb scaling groupfor the Cluster running option.
-
Choose your group in the dropdown in the
Kdb scaling group detailssection.
-
Enter a node count of "1". This will be the number of instances in a cluster. For the MVP only 1 is needed.
-
Set
Memory reservation per nodeto the minimum value (6 MiB). -
Leave Tags as empty and select
Nextto go to the next page.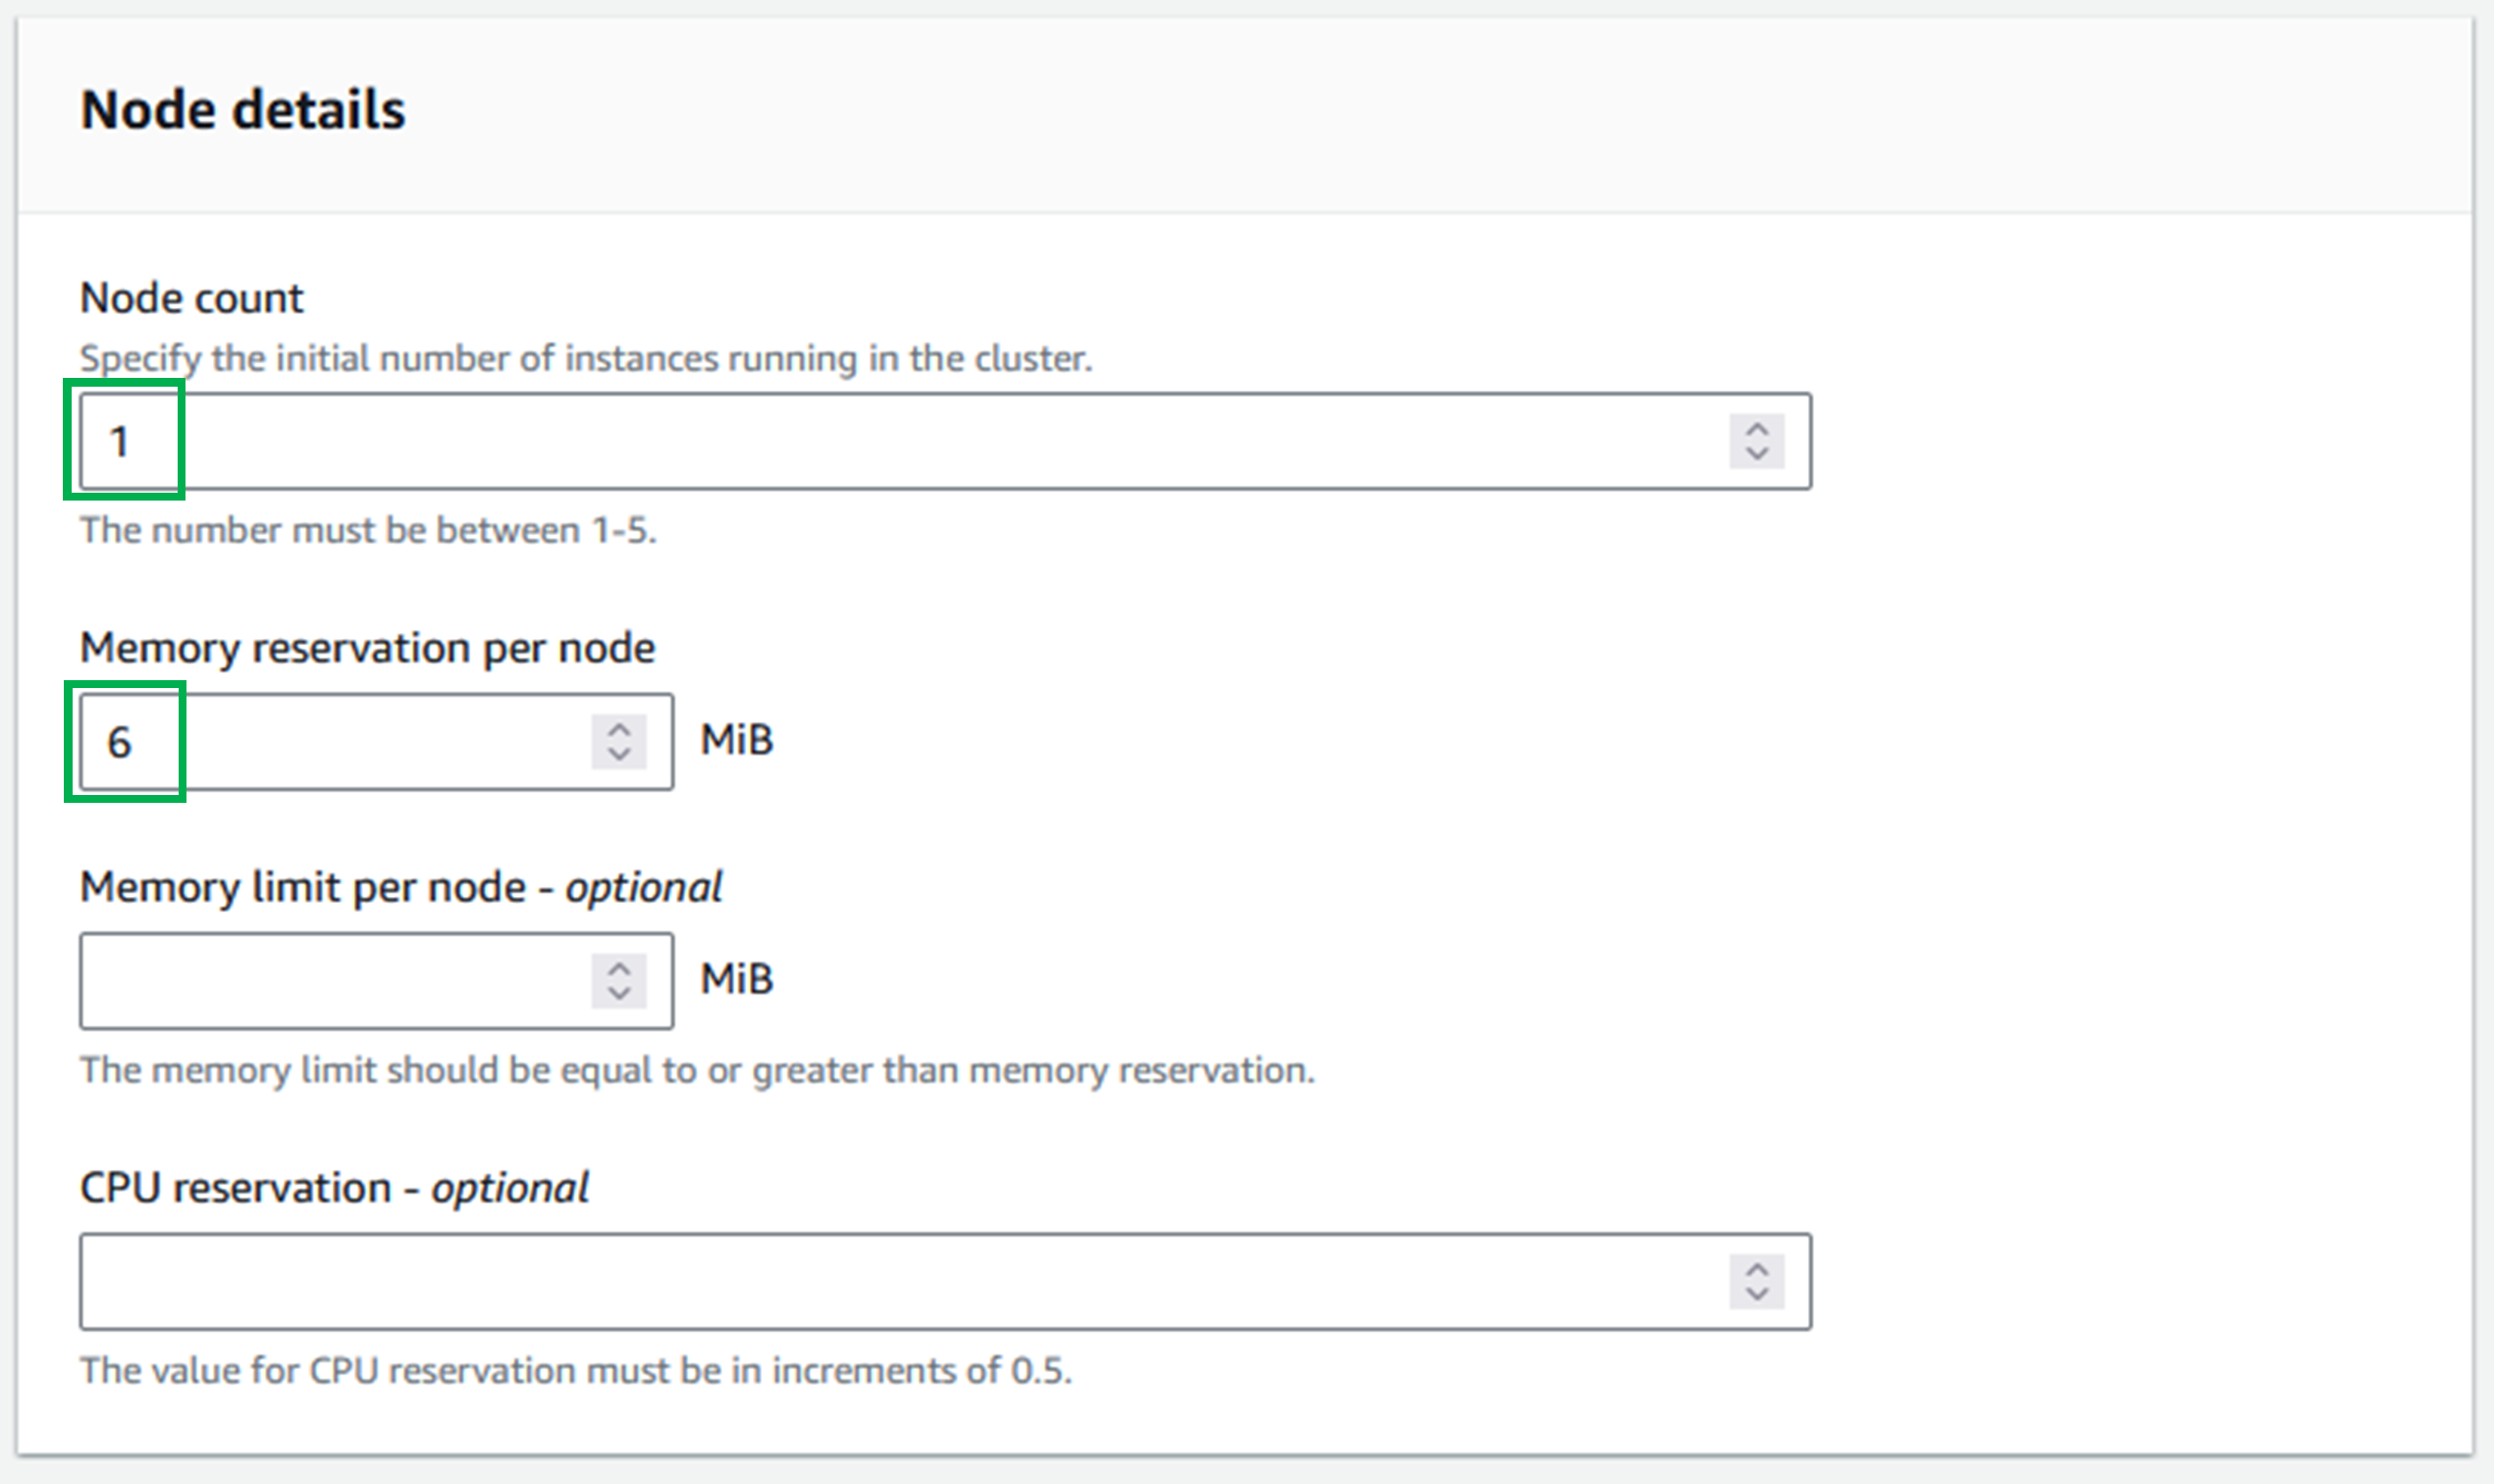
-
Select
Browse S3, search and select your codebucket and select your code.zip file.- Alternatively, you can copy the URL from the codebucket itself.
-
Enter
TorQ-Amazon-FinSpace-Starter-Pack/env.qas your initialization script. -
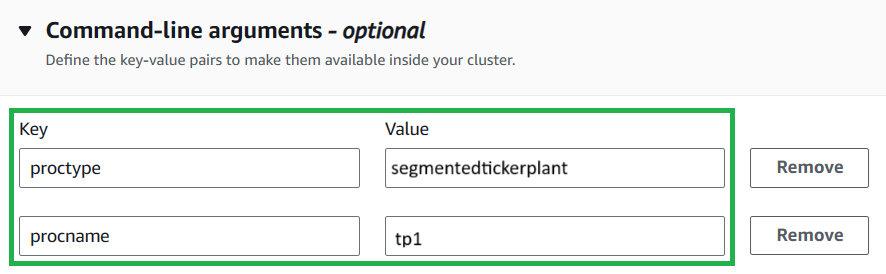
Select
Add command-line argumenttwice and enter the keys and values in the below table:Key Value proctype segmentedtickerplant procname tp1 This specified initialization script and the command line arguments will set up the necessary environment for your cluster.
-
Select
Nextto go to the next page. -
Select your previously created VPC ID, Subnets, and Security Groups (we can use the readily available default), then select
Nextto go to the next page. -
Select your volume, then select
Nextto go to the next page.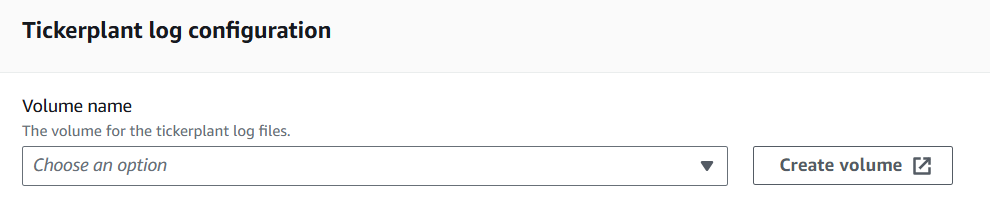
-
Check the entered information in the review page, then select
Create cluster.
Real-Time Database (RDB) Cluster
-
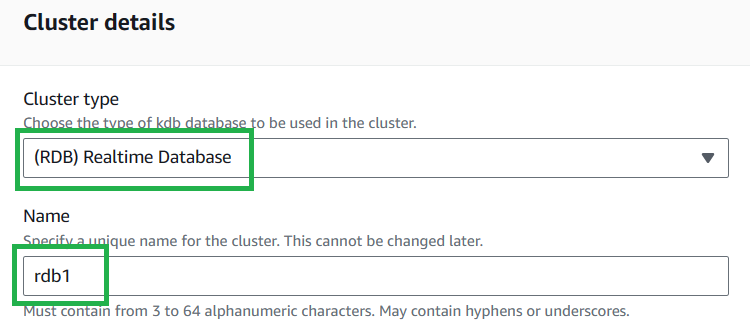
Set the cluster type to “RDB".
-
Choose a name for your cluster.
- Note: This name must match your process name,
procname, added during the next stage of cluster creation - This is due to process connections requiring the cluster name, which is not visible from within the process, but procname is. Our suggestion is to use the process type (proctype) with a number e.g.rdb1.
- Note: This name must match your process name,
-
Select the execution role for the IAM user previously created. The user for all 6 clusters should be the same. This is so that each cluster has the correct permissions.
-
Select
Run on kdb scaling groupfor the Cluster running option.
-
Choose your group in the dropdown in the
Kdb scaling group detailssection.
-
Enter a node count of "1". This will be the number of instances in a cluster. For the MVP only 1 is needed.
-
Set
Memory reservation per nodeto the minimum value (6 MiB). -
Leave Tags as empty and select
Nextto go to the next page.
-
Select
Browse S3, search and select your codebucket and select your code.zip file.- Alternatively, you can copy the URL from the codebucket itself.
-
Enter
TorQ-Amazon-FinSpace-Starter-Pack/env.qas your initialization script. -
Select
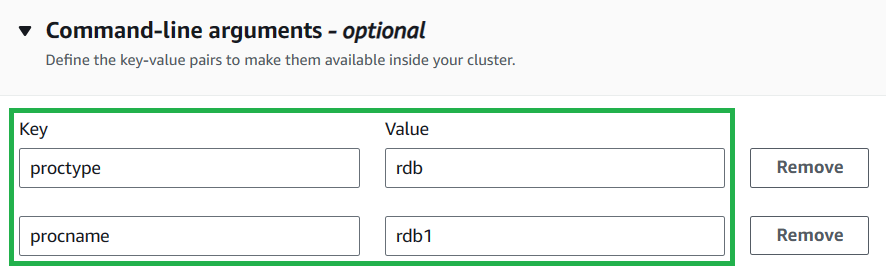
Add command-line argumenttwice and enter the keys and values in the below table:Key Value proctype rdb procname rdb1 This specified initialization script and the command line arguments will set up the necessary environment for your cluster.
-
Select
Nextto go to the next page. -
Select your previously created VPC ID, Subnets, and Security Groups (we can use the readily available default), then select
Nextto go to the next page. -
In the
Savedown database configurationsection, select your database in theDatabase namedropdown menu. -
In the
Savedown storage configuration - optionalsection, select your volume in theVolume name - optionaldropdown menu. -
In the
Tickerplant log configuration - optionalsection, select your volume here too from the dropdown menu.- This will allow your RDB access to the TP logs for recovery.
-
Select
Nextto go to the next page.
-
Check the entered information in the review page, then select
Create cluster.
Historical Database (HDB) Cluster
-
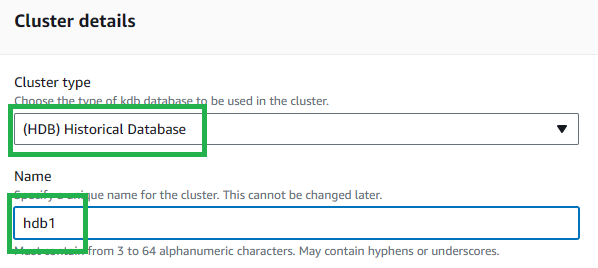
Set the
Cluster typetoHDB. -
Choose a name for your cluster.
- Note: This name must match your process name,
procname, added during the next stage of cluster creation - This is due to process connections requiring the cluster name, which is not visible from within the process, but procname is. Our suggestion is to use the process type (proctype) with a number e.g.hdb1.
- Note: This name must match your process name,
-
Select the execution role for the IAM user previously created. The user for all 6 clusters should be the same. This is so that each cluster has the correct permissions.
-
Select
Run on kdb scaling groupfor the Cluster running option.
-
Choose your group in the dropdown in the
Kdb scaling group detailssection.
-
Enter a node count of "1". This will be the number of instances in a cluster. For the MVP only 1 is needed.
-
Set
Memory reservation per nodeto the minimum value (6 MiB). -
Leave Tags as empty and select
Nextto go to the next page.
-
Select
Browse S3, search and select your codebucket and select your code.zip file.- Alternatively, you can copy the URL from the codebucket itself.
-
Enter
TorQ-Amazon-FinSpace-Starter-Pack/env.qas your initialization script. -
Select
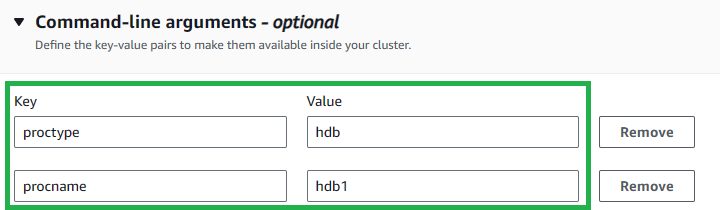
Add command-line argumenttwice and enter the keys and values in the below table:Key Value proctype hdb procname hdb1 This specified initialization script and the command line arguments will set up the necessary environment for your cluster.
-
Select
Nextto go to the next page. -
Select your previously created VPC ID, Subnets, and Security Groups (we can use the readily available default), then select
Nextto go to the next page. -
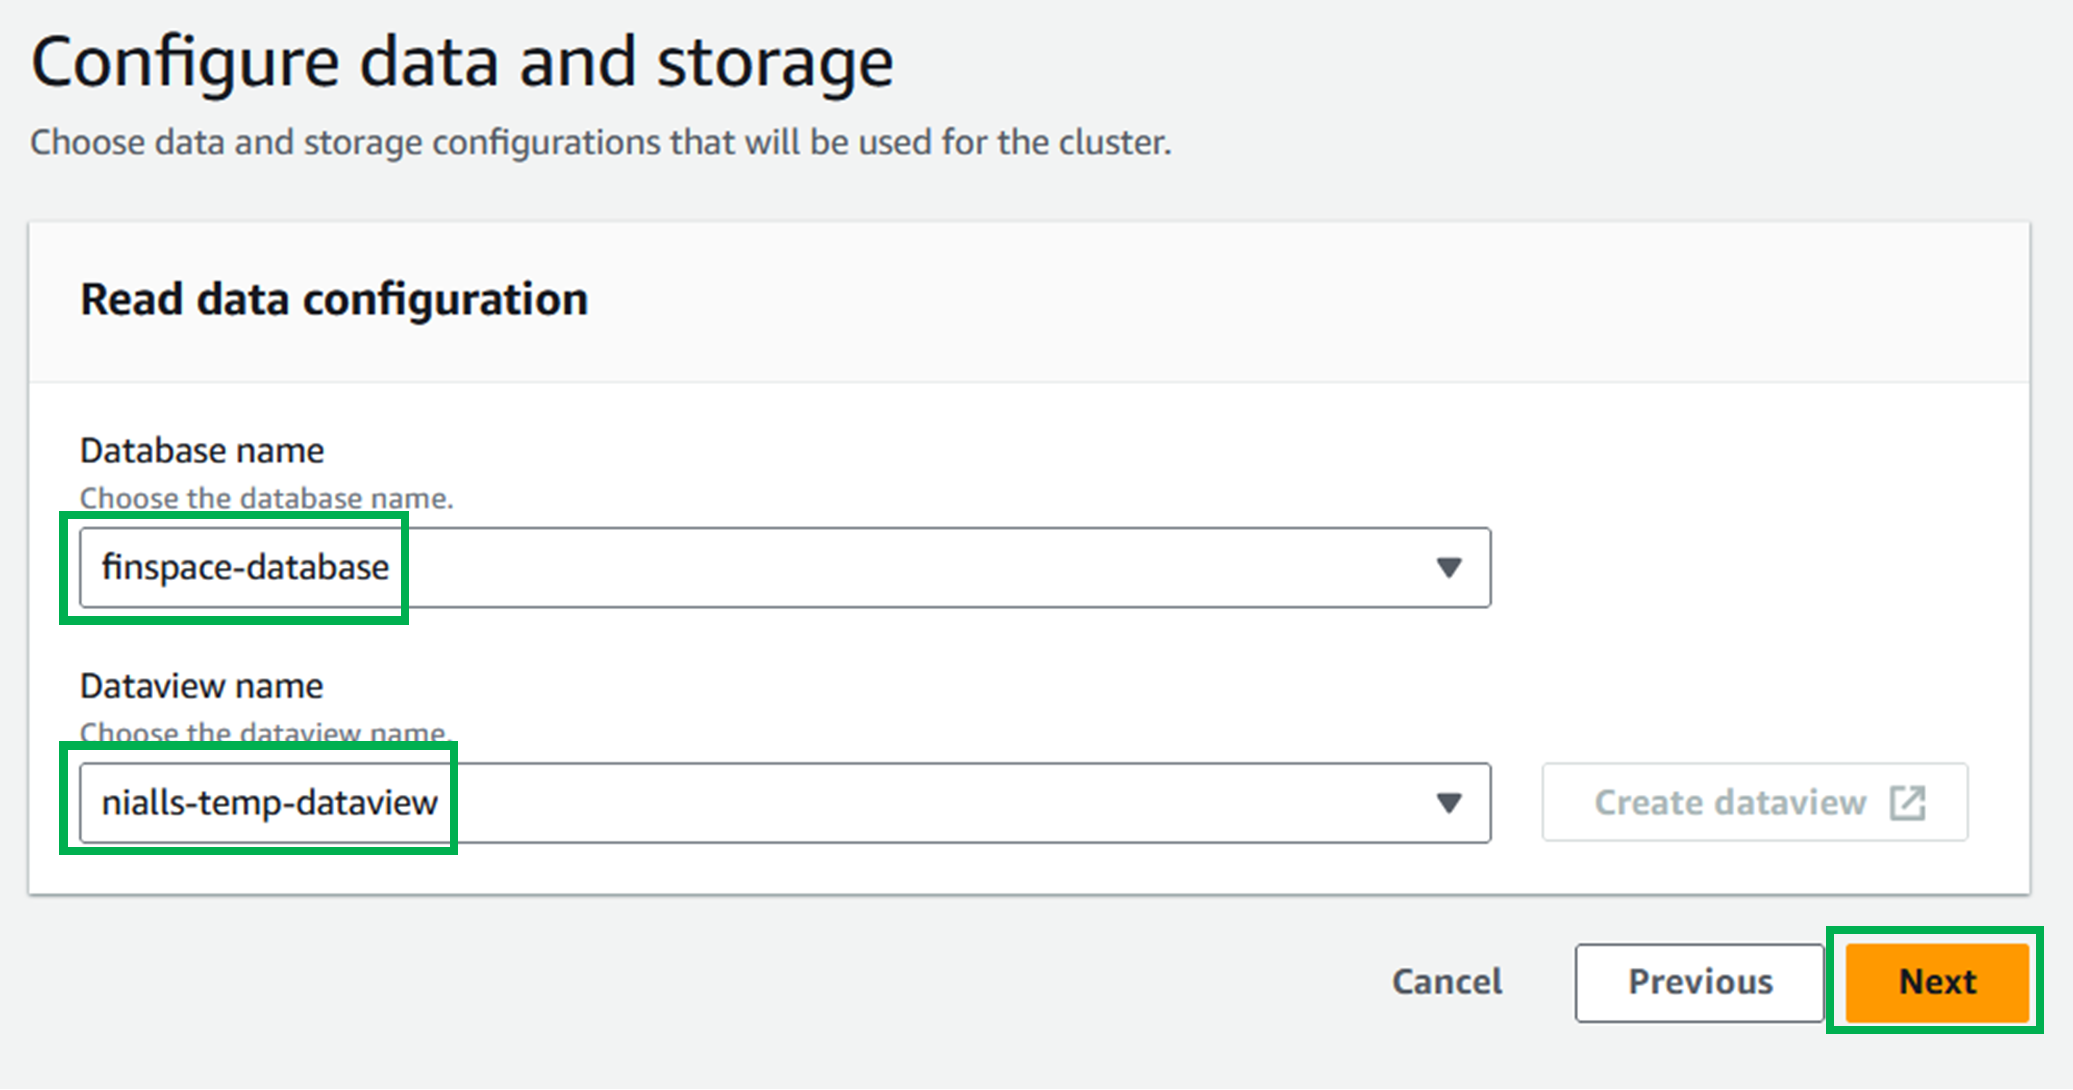
For
Database name, select your database from the dropdown menu. -
For
Dataview name, select your dataview from the dropdown menu. -
Select
Nextto go to the next page.
- Check the entered information in the review page, then select
Create cluster.
Gateway Cluster
Ensure that the Discovery cluster is in a "Running" state before creating the Gateway cluster.
-
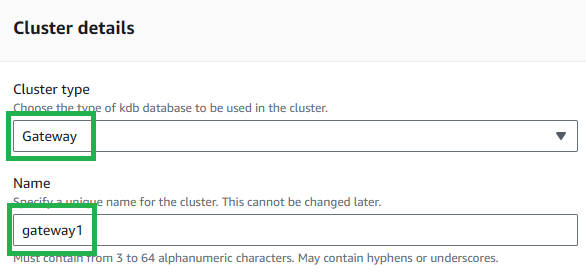
Set the
Cluster typetoGateway. -
Choose a name for your cluster.
- Note: This name must match your process name,
procname, added during the next stage of cluster creation - This is due to process connections requiring the cluster name, which is not visible from within the process, but procname is. Our suggestion is to use the process type (proctype) with a number e.g.gateway1.
- Note: This name must match your process name,
-
Select the execution role for the IAM user previously created. The user for all 6 clusters should be the same. This is so that each cluster has the correct permissions.
-
Select
Run on kdb scaling groupfor the Cluster running option.
-
Choose your group in the dropdown in the
Kdb scaling group detailssection.
-
Enter a node count of "1". This will be the number of instances in a cluster. For the MVP only 1 is needed.
-
Set
Memory reservation per nodeto the minimum value (6 MiB). -
Leave Tags as empty and select
Nextto go to the next page.
-
Select
Browse S3, search and select your codebucket and select your code.zip file.- Alternatively, you can copy the URL from the codebucket itself.
-
Enter
TorQ-Amazon-FinSpace-Starter-Pack/env.qas your initialization script. -
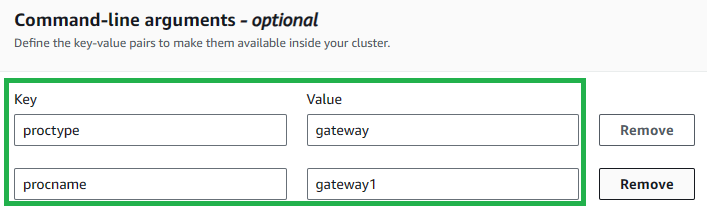
Select
Add command-line argumenttwice and enter the keys and values in the below table:Key Value proctype gateway procname gateway1 This specified initialization script and the command line arguments will set up the necessary environment for your cluster.
-
Select
Nextto go to the next page. -
Select your previously created VPC ID, Subnets, and Security Groups (we can use the readily available default), then select
Nextto go to the next page. -
This page had no editing options. Select
Nextto go to the next page. -
Check the entered information in the review page, then select
Create cluster.
Feed Cluster
Ensure that the RDB cluster is in a Running state before creating the Feed cluster.
-
Set the
Cluster typetoGeneral purpose, also known as "GP". -
Choose a name for your cluster. As this is a sample feed and not a "production" intended process, please name it
feed1.
-
Select the execution role for the IAM user previously created. The user for all 6 clusters should be the same. This is so that each cluster has the correct permissions.
-
Select
Run on kdb scaling groupfor the Cluster running option.
-
Choose your group in the dropdown in the
Kdb scaling group detailssection.
-
In the
Node detailssection, set theMemory reservation per nodeto the minimum allowed (6 MiB) and leave the rest blank.
-
Leave Tags as empty and select
Nextto go to the next page. -
Select
Browse S3, search and select your codebucket and select your code.zip file.- Alternatively, you can copy the URL from the codebucket itself.
-
Enter
TorQ-Amazon-FinSpace-Starter-Pack/env.qas your initialization script. -
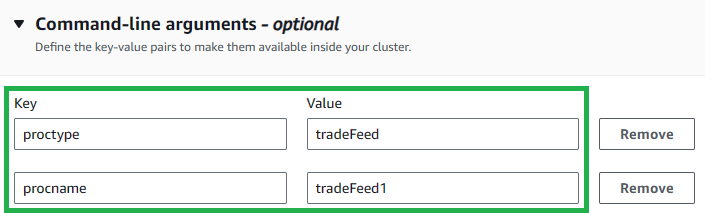
Select
Add command-line argumenttwice and enter the keys and values in the below table:Key Value proctype tradeFeed procname tradeFeed1 This specified initialization script and the command line arguments will set up the necessary environment for your cluster.
-
Select
Nextto go to the next page. -
Select your previously created VPC ID, Subnets, and Security Groups (we can use the readily available default), then select
Nextto go to the next page. -
Leave everything as blank and click
Nextto move on to the next page.
-
Check the entered information in the review page, then select
Create cluster.
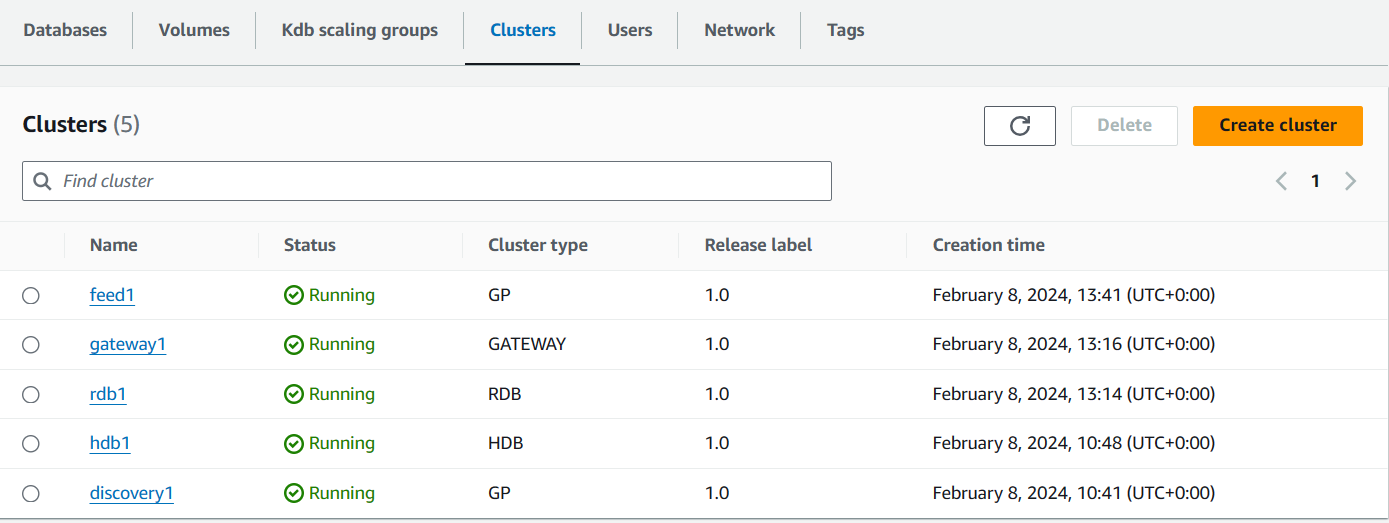
On Completion
When all clusters are up it should look like this:
Errors in cluster creation
On cluster creation, most errors will result in your cluster going to a Create failed state.
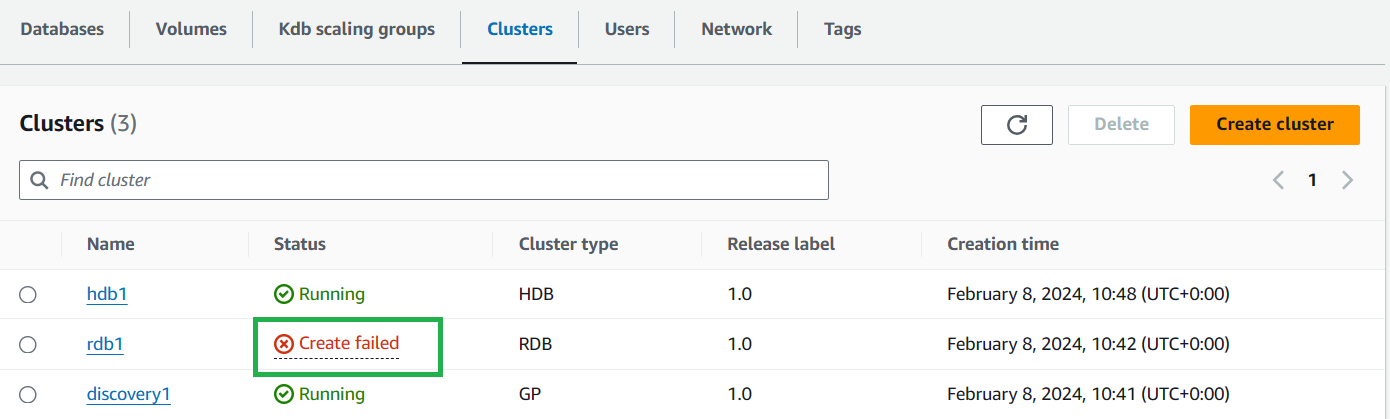
If that is the case you should:
-
Click the cluster name in the
Clusterssection of your environment.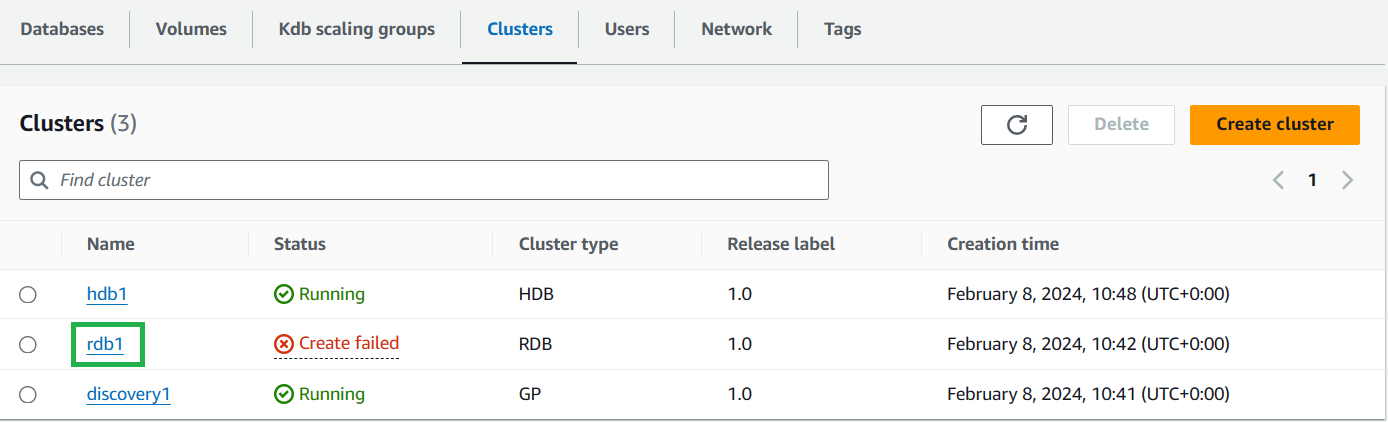
-
Scroll down the page and open the
Logstab. This should have a message with a more individualised error you can check. -
If you click the LogStream for an individual log it will take you to AWS CloudWatch where you can filter the messages for keywords or for messages in a certain time window.
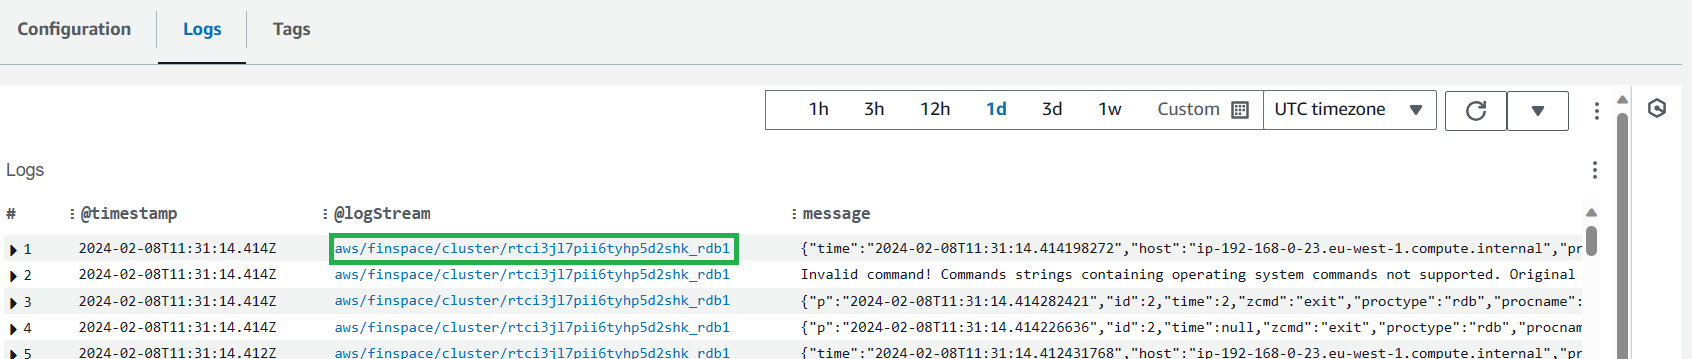
It is worthwhile checking the logs even for clusters that have been created and searching for terms like err, error or fail.